Getting Started with Clapperbie: From Setup to Your First Script
Learn how to create a project, write and format your first scene, navigate production entities, and export an industry-standard PDF.
Overview
Clapperbie is a dedicated screenwriting and pre-production environment designed to take your story from initial script pages to a fully broken-down production.
In this tutorial, you will:
- Create a project and initialize a new screenplay.
- Write a scene using intelligent keyboard-driven formatting.
- Navigate the workspace, scene outlines, and auto-generated production entities.
- Export a formatted PDF ready for table reads and production sharing.
Step 1: Create a Project and Screenplay
When you launch Clapperbie, the Welcome screen displays quick-start actions, recent files, and basic shortcuts.
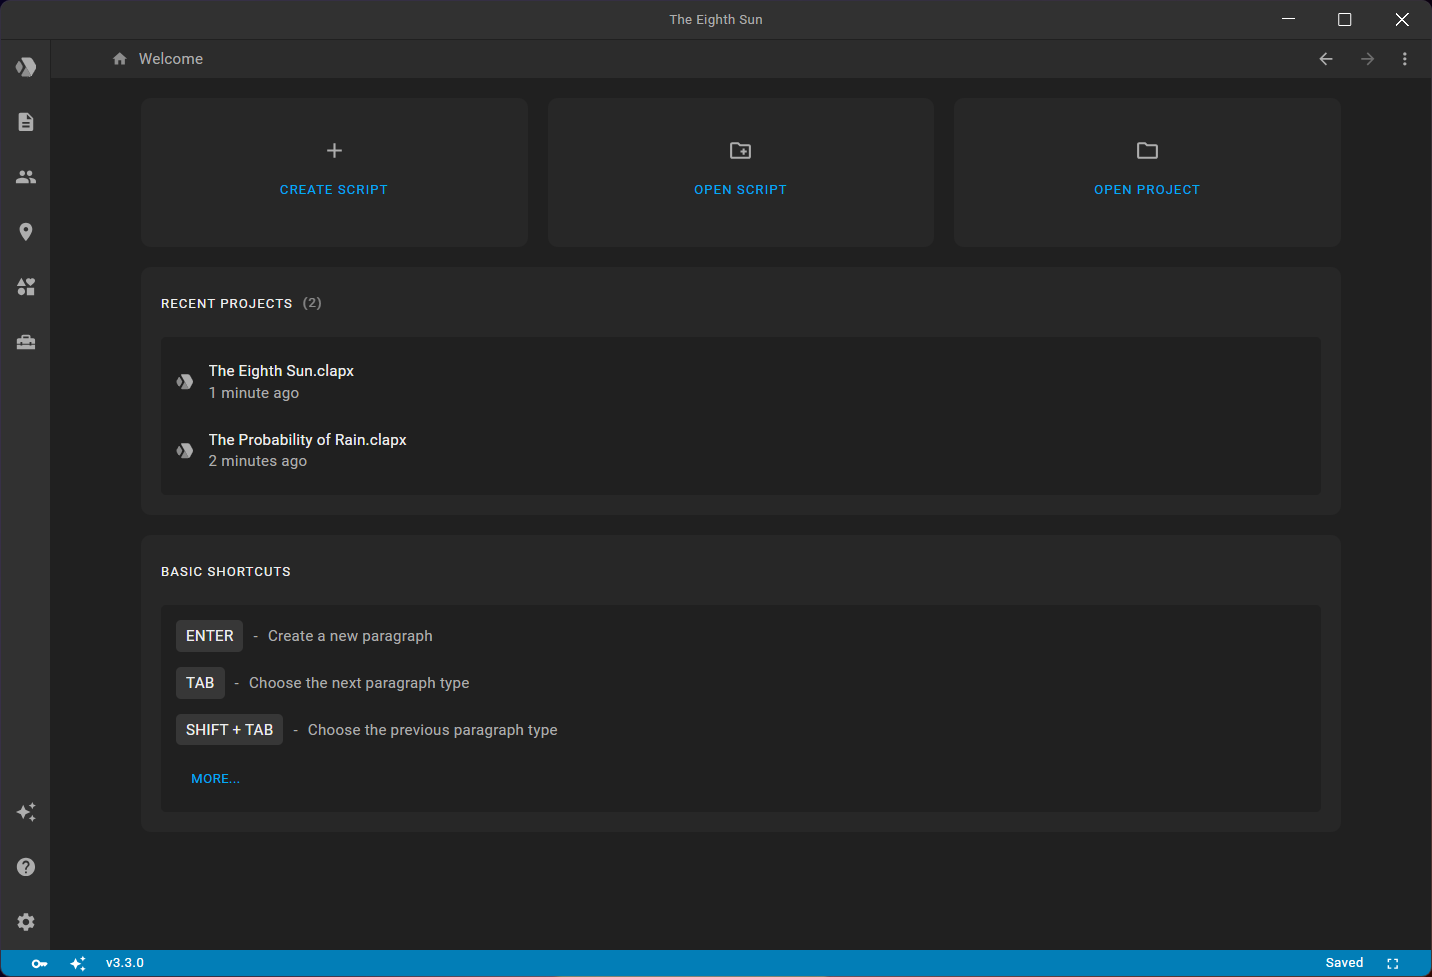
- Click Create Script on the Welcome screen (or open the Scripts section from the left sidebar and click the Create action).
- In the dialog, enter the title of your script (for example,
The Midnight Shift) and confirm. - Clapperbie creates the script and immediately opens it in a dedicated editor tab.
Tip: Clapperbie stores all scripts, character profiles, locations, and breakdown data inside a single project file (
.clapx). Save your project to disk at any time usingCtrl + S(Cmd + Son macOS) or via the Projects tab in the sidebar.
Step 2: Write and Format Your First Scene
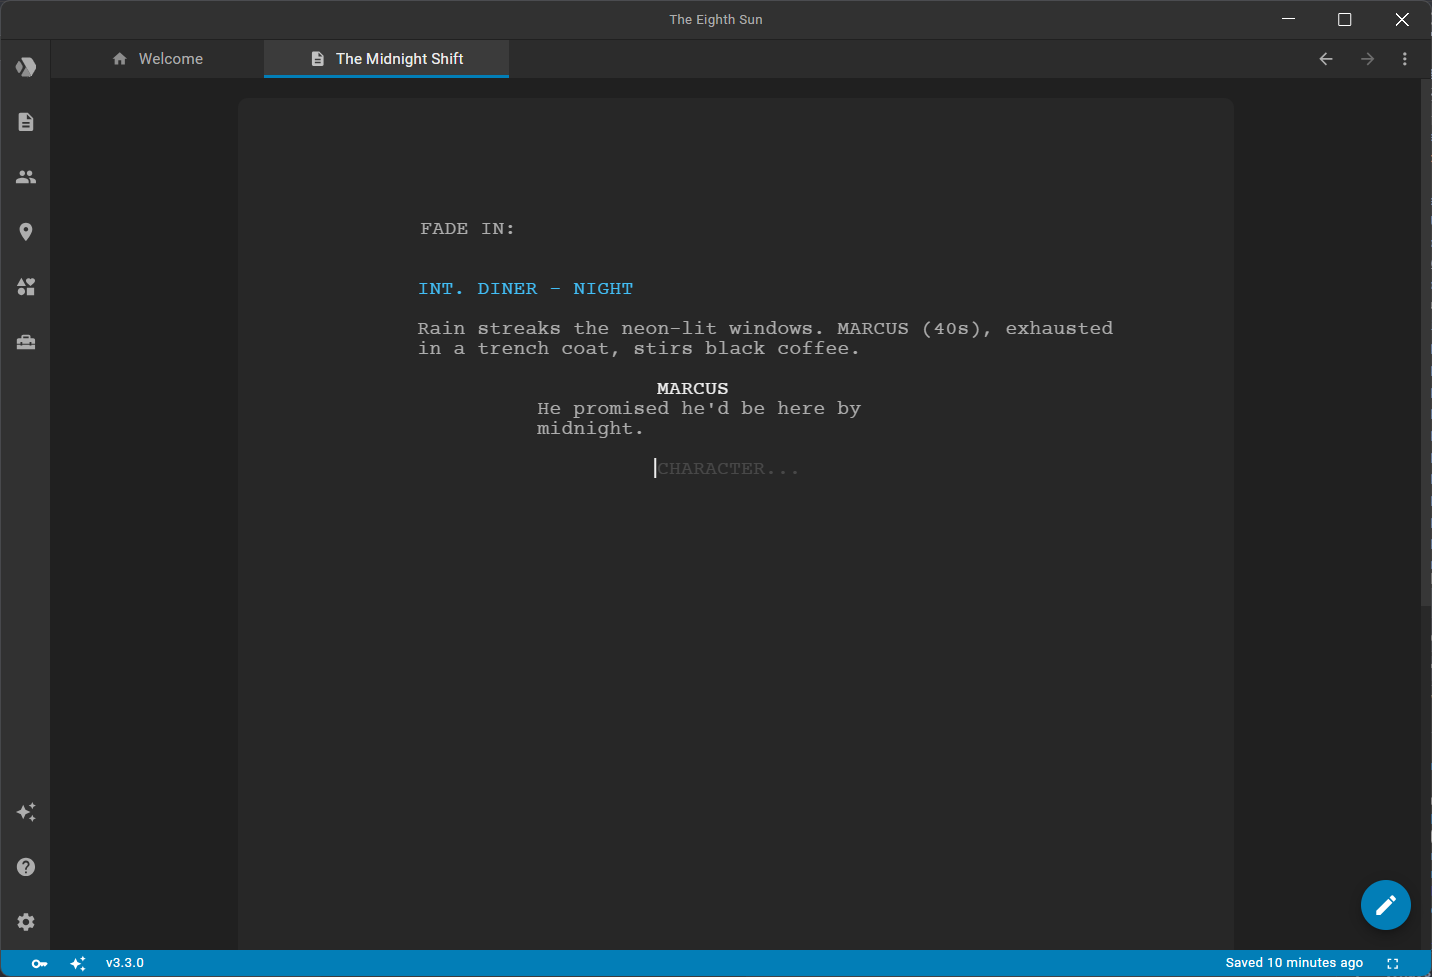
The script editor automatically formats industry-standard screenplay elements as you type. You can write continuously without reaching for the mouse by using natural keyboard shortcuts.
1. Scene Heading (Slugline)
Start your scene by typing a standard scene heading:
textINT. DINER - NIGHT
- Shortcut:
Ctrl + 1sets the current block to Scene Header. - Autocomplete suggestions for scene prefixes (
INT.,EXT.,INT./EXT.) appear automatically. - Press
Enterto finish the heading and automatically transition into an Action block.
2. Action
Describe the setting and movement:
textRain streaks the neon-lit windows. MARCUS (40s), exhausted in a trench coat, stirs black coffee.
- Shortcut:
Ctrl + 2sets the block to Action. - Pressing
Enterat the end of an action block creates a new action line.
3. Character and Dialogue
Introduce dialogue:
- Press
Tabfrom a blank line (or pressCtrl + 3) to switch the block to Character. - Type the character name:
MARCUS. - Press
Enter. The editor automatically switches to Dialogue (Ctrl + 4). - Type the dialogue:
text
He promised he'd be here by midnight. - Press
Enterto create the next Character cue (for the next speaker), or pressTabto switch to Action for scene description.
Quick Formatting Reference
| Element | Shortcut | Next Default on Enter |
|---|---|---|
| Scene Heading | Ctrl + 1 | Action |
| Action | Ctrl + 2 | Action |
| Character | Ctrl + 3 | Dialogue |
| Dialogue | Ctrl + 4 | Character |
| Parenthetical | Ctrl + 6 | Dialogue |
| Transition | Ctrl + 5 | Scene Heading |
| Act | Ctrl + 7 | Scene Heading |
Tip: Use
Tabto cycle forward through allowed block types in context, andShift + Tabto cycle backward.
Step 3: Workspace Navigation and Production Entities
The left sidebar gives you instant access to your story elements and production breakdown tools:
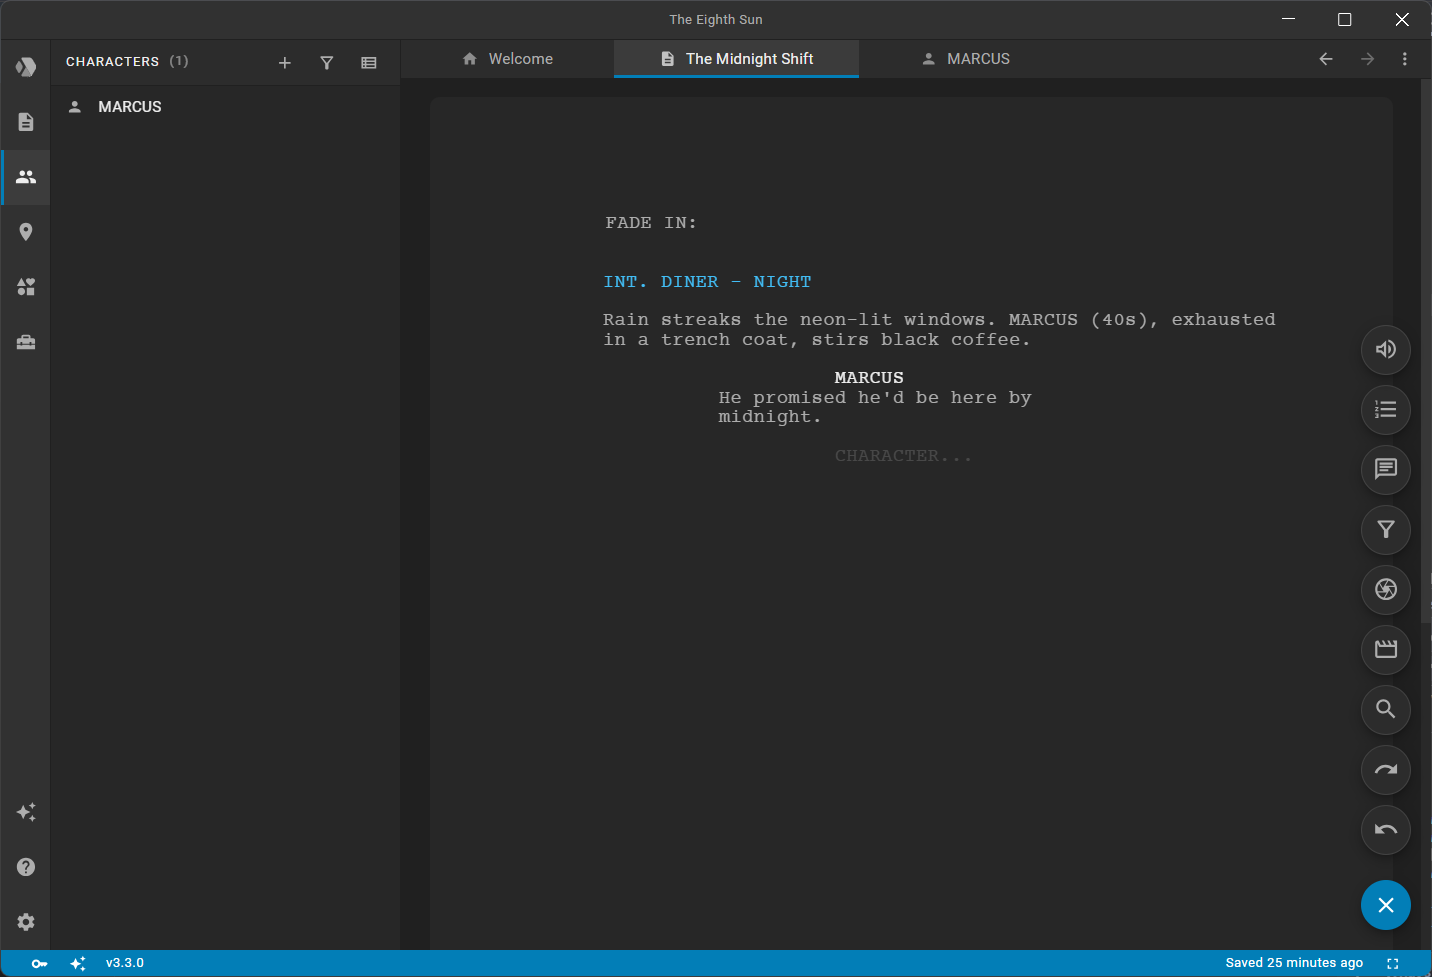
- Projects — Manage project metadata, manage local and cloud files, and initiate real-time Collaboration sessions with a shareable room link.
- Scripts — View, create, import, rename, and manage scripts in your project, with quick access to script settings, exports, and dedicated production tools (including Index Cards, Shot List, Scheduling, and Dood Report).
- Characters — Automatically indexes every character detected in your script. Add backstory notes, casting descriptions, and reference images.
- Locations — Automatically detects locations from scene headings. Manage location details, descriptions, and reference images.
- Elements — Track and manage production elements across categories (props, wardrobe, vehicles, etc.) linked to your scenes.
- Tools — Configure breakdown categories and colors, customize shot list parameters (shot sizes, framing, angles, camera movements, equipment), and manage custom properties.
Scene Outline and Editor Actions
Inside the script editor, click the floating action button on the bottom right to open essential tools:
- Scenes — Opens the Scene Navigator to jump directly to any scene in your script.
- Search (
Ctrl + F) — Search text across the active draft. - Comments — Add and resolve editorial notes.
- Versions — Compare revisions and restore previous text snapshots.
- Speech — Read the script aloud using speech synthesis for table-read verification.
Step 4: Export Your Script to PDF
Once your scene is written, export it to an industry-standard PDF formatted to standard margins and Courier typography.
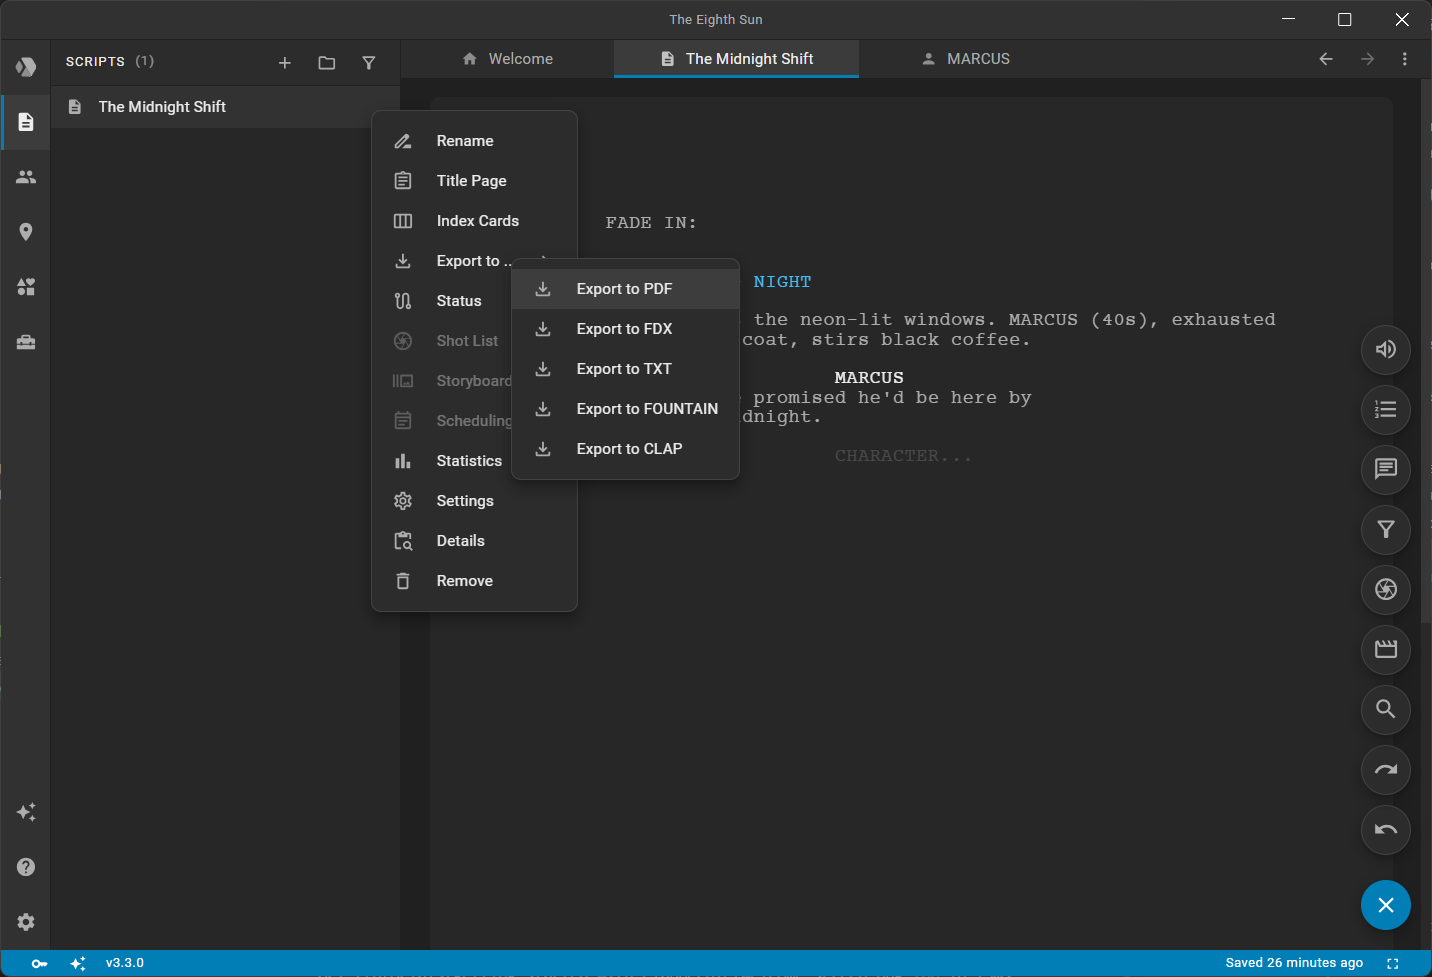
- Press
Ctrl + Alt + P(Cmd + Option + Pon macOS) while inside the editor, or open the Scripts sidebar, click the actions menu (...) next to your script, and select Export to PDF. - Select your formatting preferences (such as including a title page or watermark).
- Click Ok to generate and save your PDF file.
Tip: You can also export your screenplay to Final Draft (.fdx), Fountain (.fountain), or plain text (TXT) from the script actions menu in the sidebar.