How to Outline Your Story with Index Cards
Structure your screenplay using virtual index cards, organize scenes into acts, color-code subplots, and reorder story beats with real-time script synchronization.
Overview
Visualizing a screenplay at a high level helps you balance story pacing, track subplots, and refine three-act structure before writing full dialogue and action.
In this tutorial, you will:
- Open the Index Cards board for your screenplay.
- Structure your narrative into Acts (columns).
- Create and populate scene cards with sluglines, synopses, and color tags.
- Reorder scenes and acts via drag-and-drop with instant script synchronization.
- Navigate seamlessly between the corkboard outline and the script editor.
Step 1: Open the Index Cards Board
Every script in your Clapperbie project has a dedicated Index Cards board.
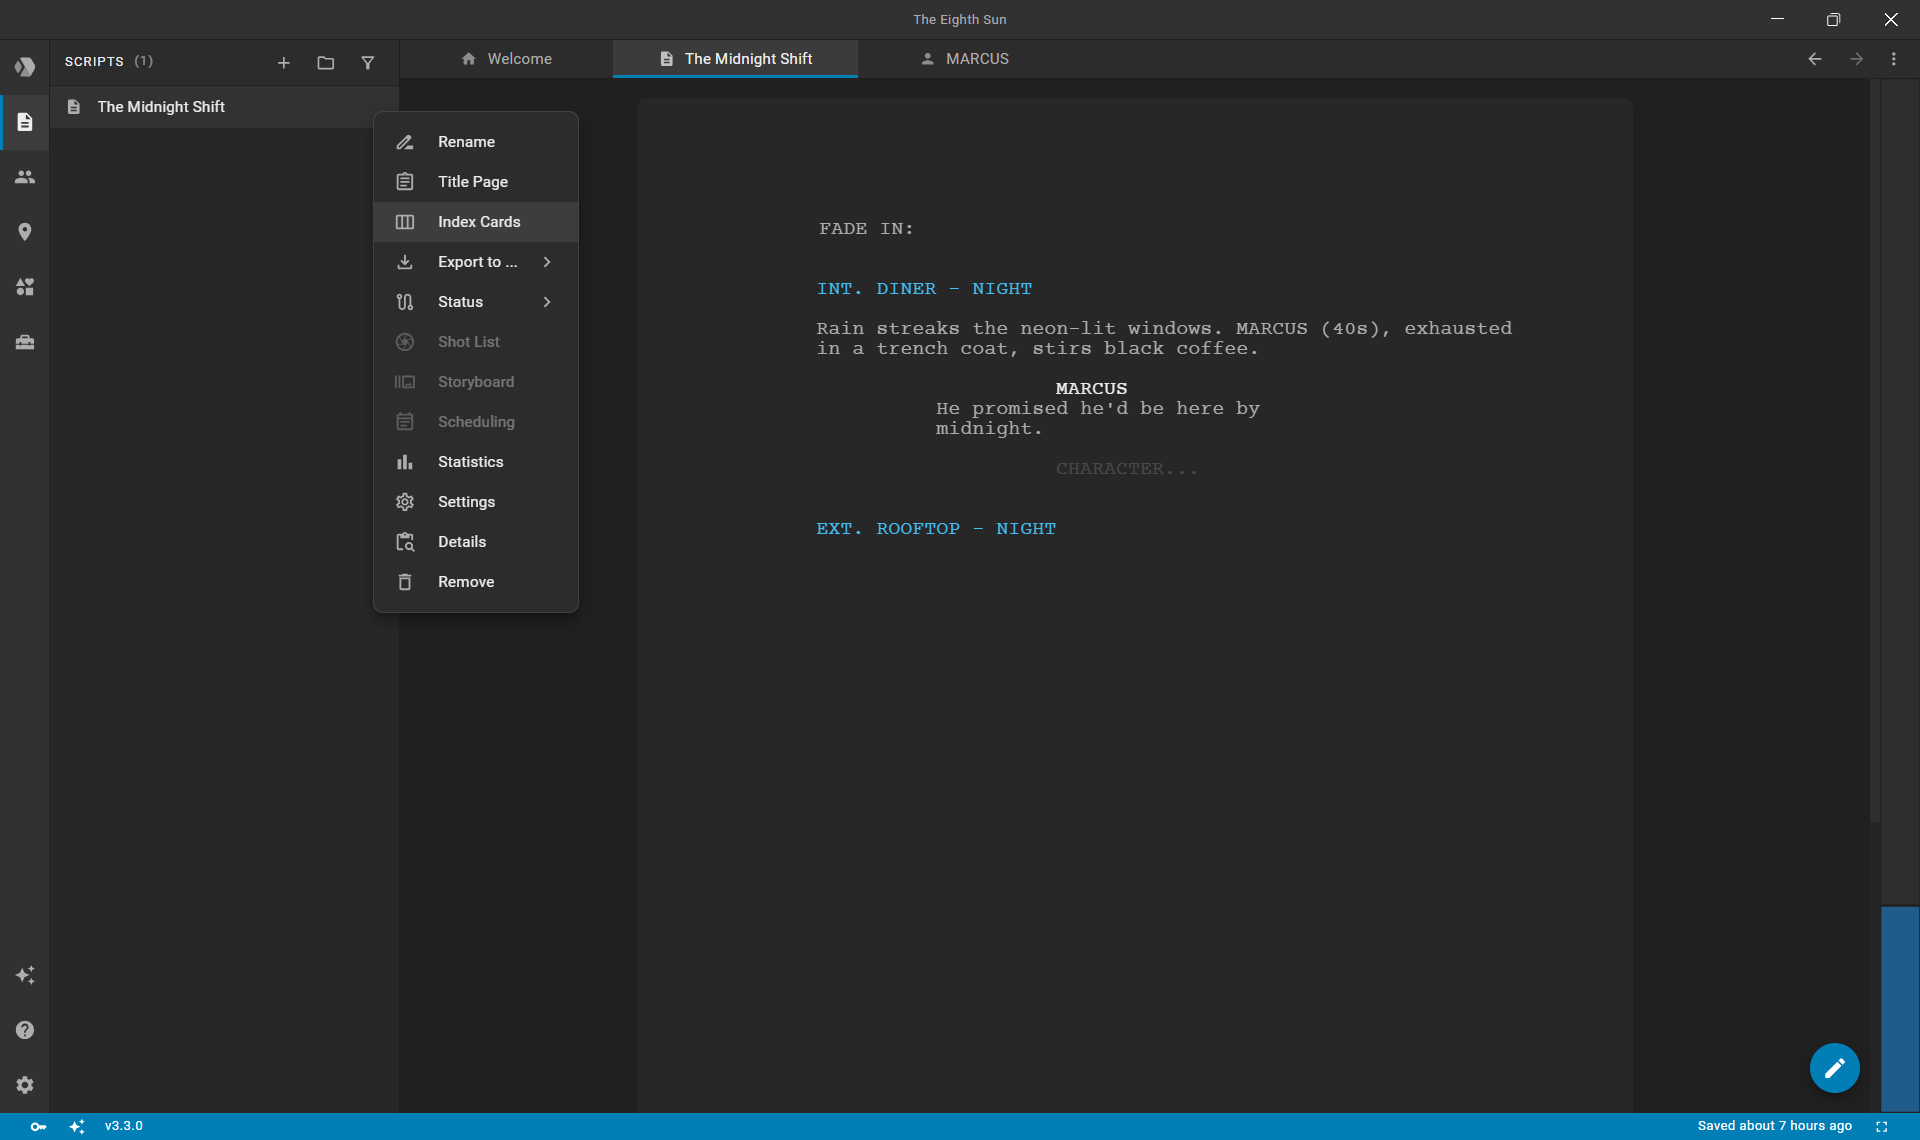
- Open the Scripts section in the left sidebar.
- Click the actions menu (
...) next to your script. - Select Index Cards.
A new editor tab opens displaying your script's visual board. If you have already written scenes in the script editor, Clapperbie automatically populates them as cards on the board.
Step 2: Organize Your Story into Acts
Columns on the board represent structural milestones or acts in your narrative.
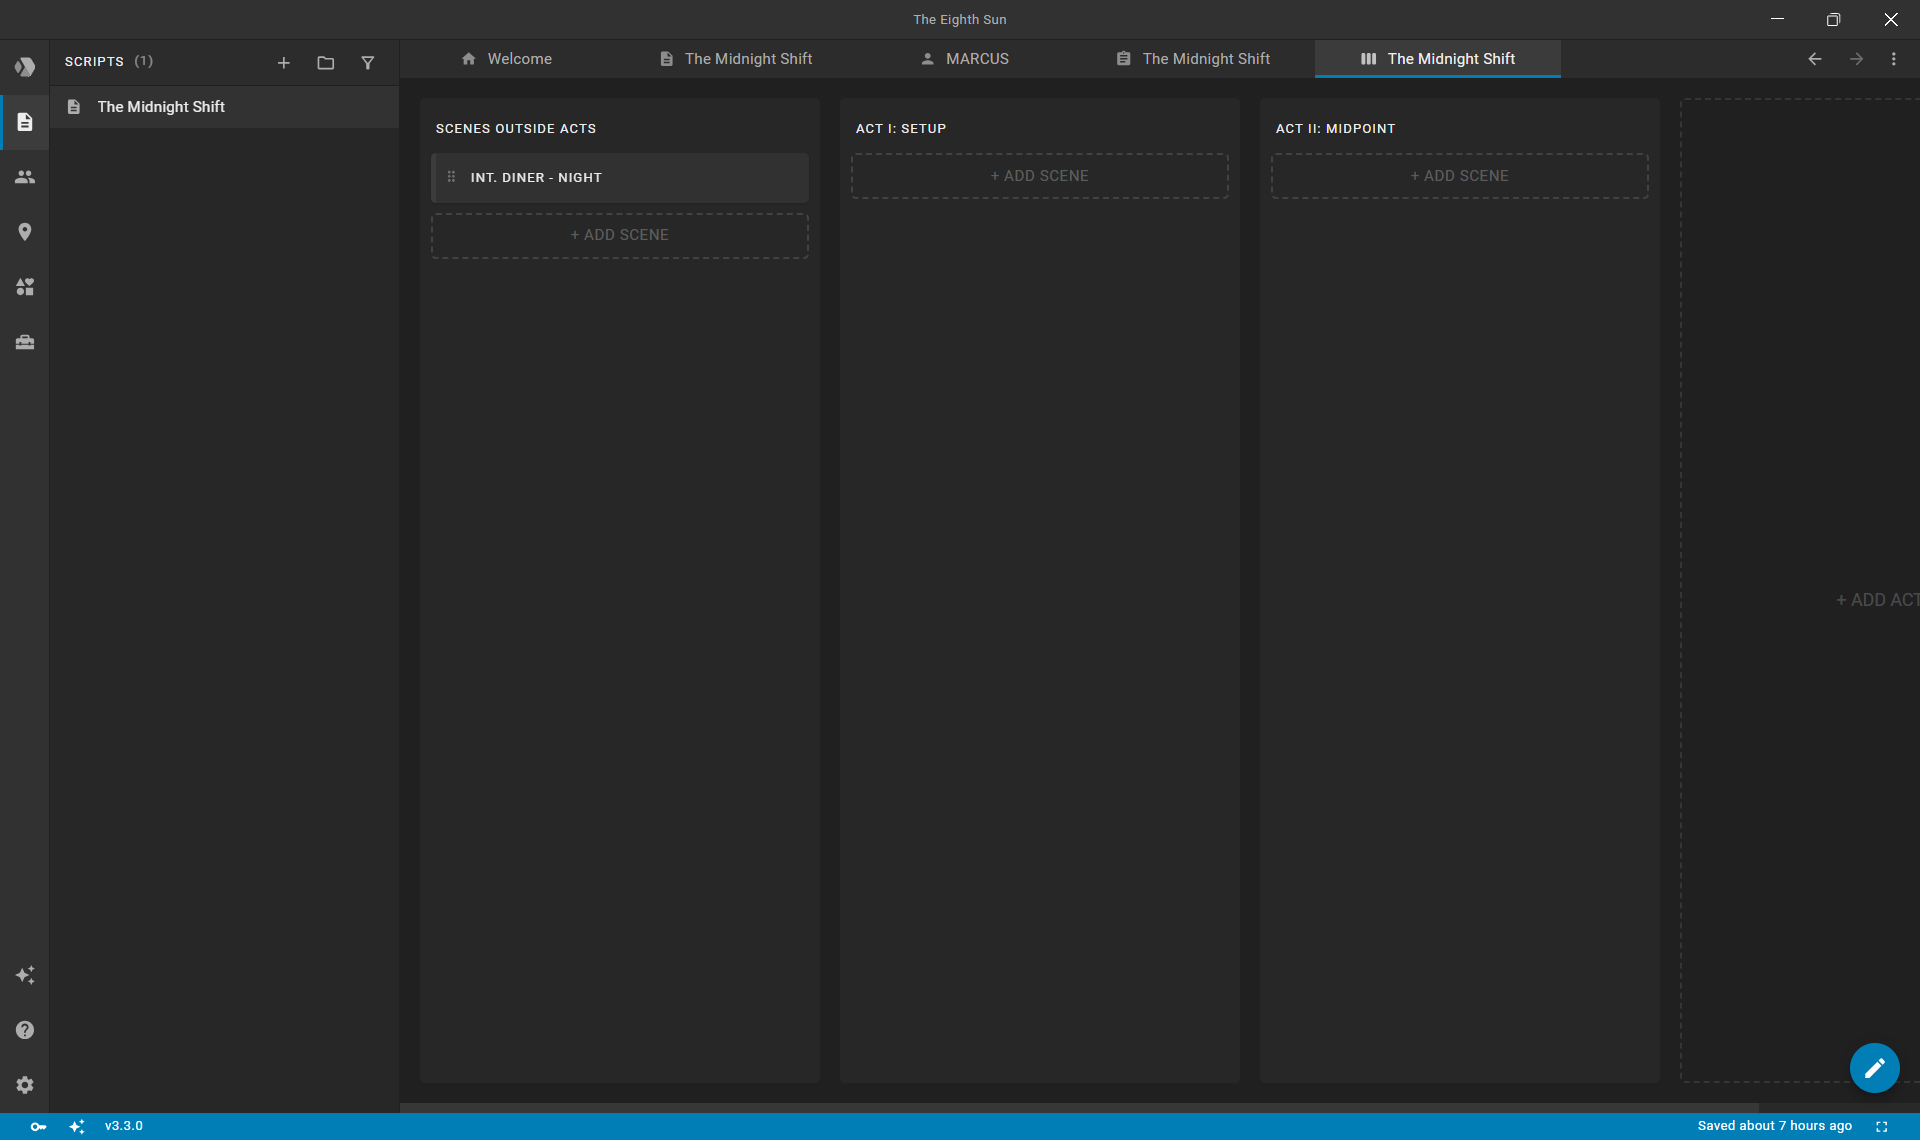
- Click the Add Act button to create a new column.
- In the act details dialog:
- Enter the Title (e.g.,
ACT I: SETUPorACT II: MIDPOINT). - Add a brief Description outlining the thematic goal of this act.
- Pick a distinctive Color to distinguish the act visually.
- Enter the Title (e.g.,
- Click Ok to place the column on the board.
- Drag columns horizontally to rearrange the overall act progression.
Tip: Any scenes created before you define custom acts reside in the default Scenes Outside Acts column until you organize them.
Step 3: Add and Edit Scene Cards
Each card represents an individual scene heading (slugline) and its dramatic beat.
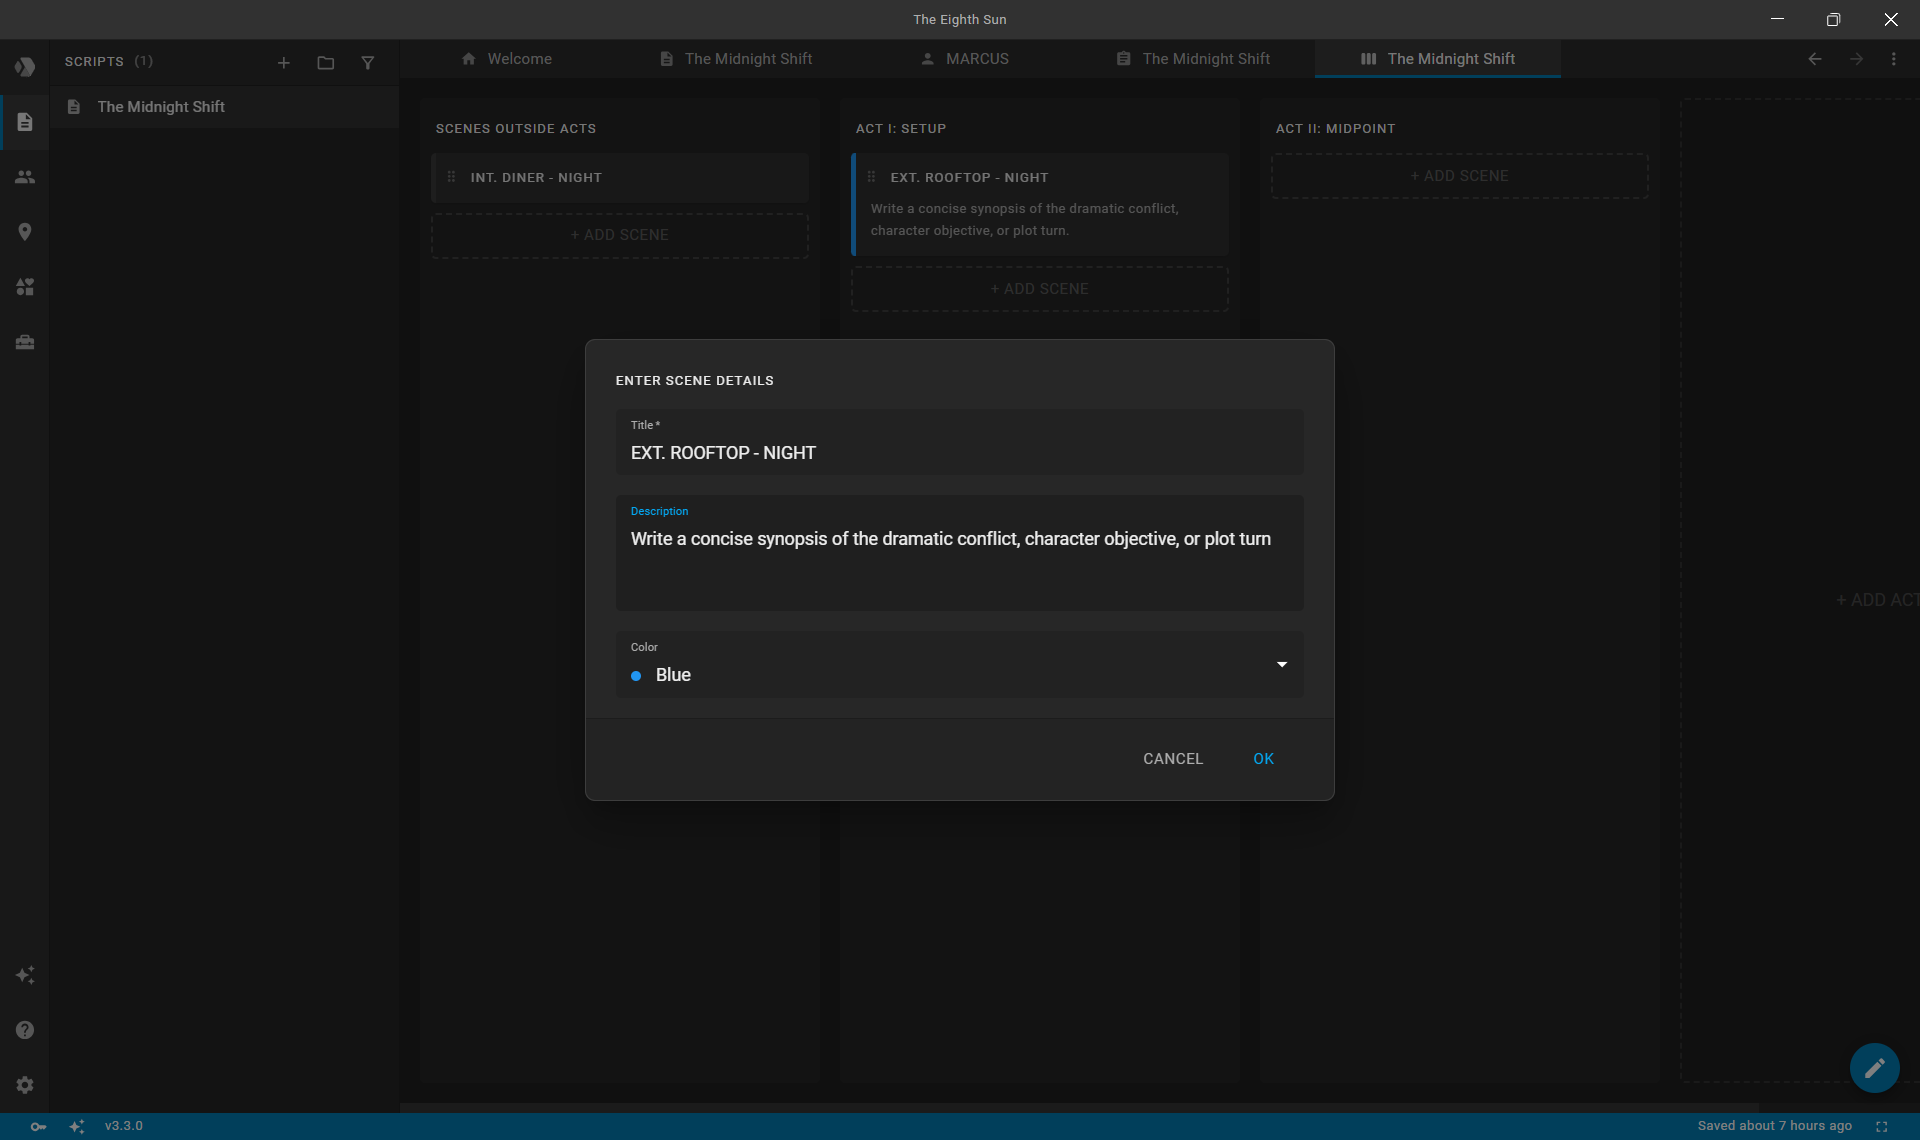
- Click the + (Add) button at the bottom of an Act column to add a scene.
- In the scene details dialog:
- Title: Enter the scene slugline (e.g.,
EXT. ROOFTOP - NIGHT). - Description: Write a concise synopsis of the dramatic conflict, character objective, or plot turn.
- Color: Assign a color tag.
- Title: Enter the scene slugline (e.g.,
- Click Ok to save the card.
Using Colors for Story Architecture
Color tags appear as a vertical indicator strip on the left border of each card. Common industry approaches include:
- Subplots / Storylines: Blue for the primary A-story, Green for the B-story (romance/mentor), Yellow for the C-story.
- Character Arcs: Assign unique colors to track which protagonist drives each sequence.
- Tone & Energy: Red for high-stakes action scenes, Violet for reflective character moments.
Step 4: Rearrange Story Beats with Drag-and-Drop
Rearranging cards on the board allows you to test alternative plot sequences without cutting and pasting text in the script editor.
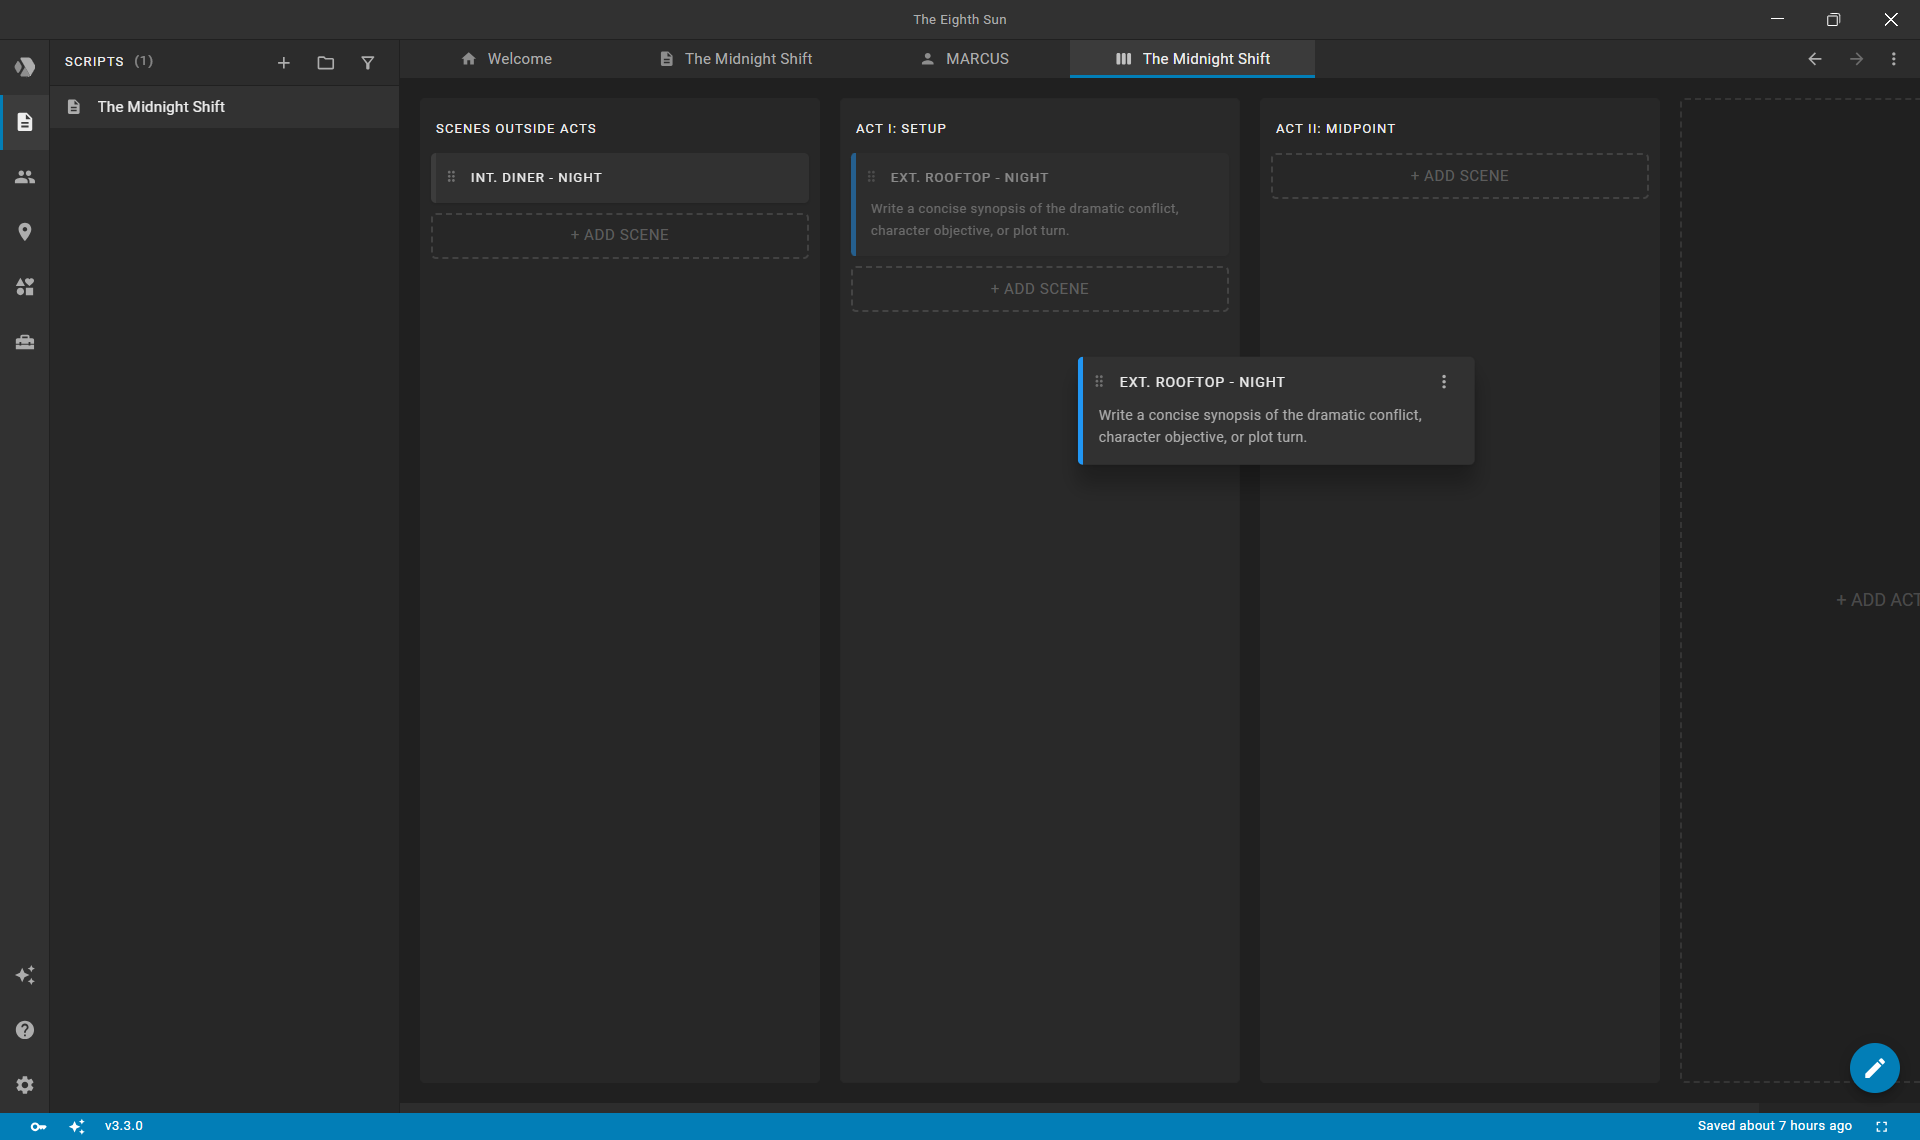
- Click and drag any card by its handle to move it up or down within its column.
- Drag a card across columns to transfer a scene into a different act.
- Use
Ctrl + Z(Cmd + Zon macOS) to undo any reordering mistake, orCtrl + Shift + Z(Cmd + Shift + Z) to redo.
Important: Clapperbie uses bidirectional synchronization. Moving a card on the board immediately updates the actual scene order in the script editor and scene outliners.
Step 5: Jump from Outline to Writing
Once your structure is aligned, transition directly from the index card overview to writing the scene:
- Click directly on any scene card (or select Open from the card's actions menu).
- Clapperbie switches to the Script editor tab and automatically scrolls to that exact scene heading, ready for you to write dialogue and action.